Wednesday, December 4, 2013

The Living Room Part 3: 3D


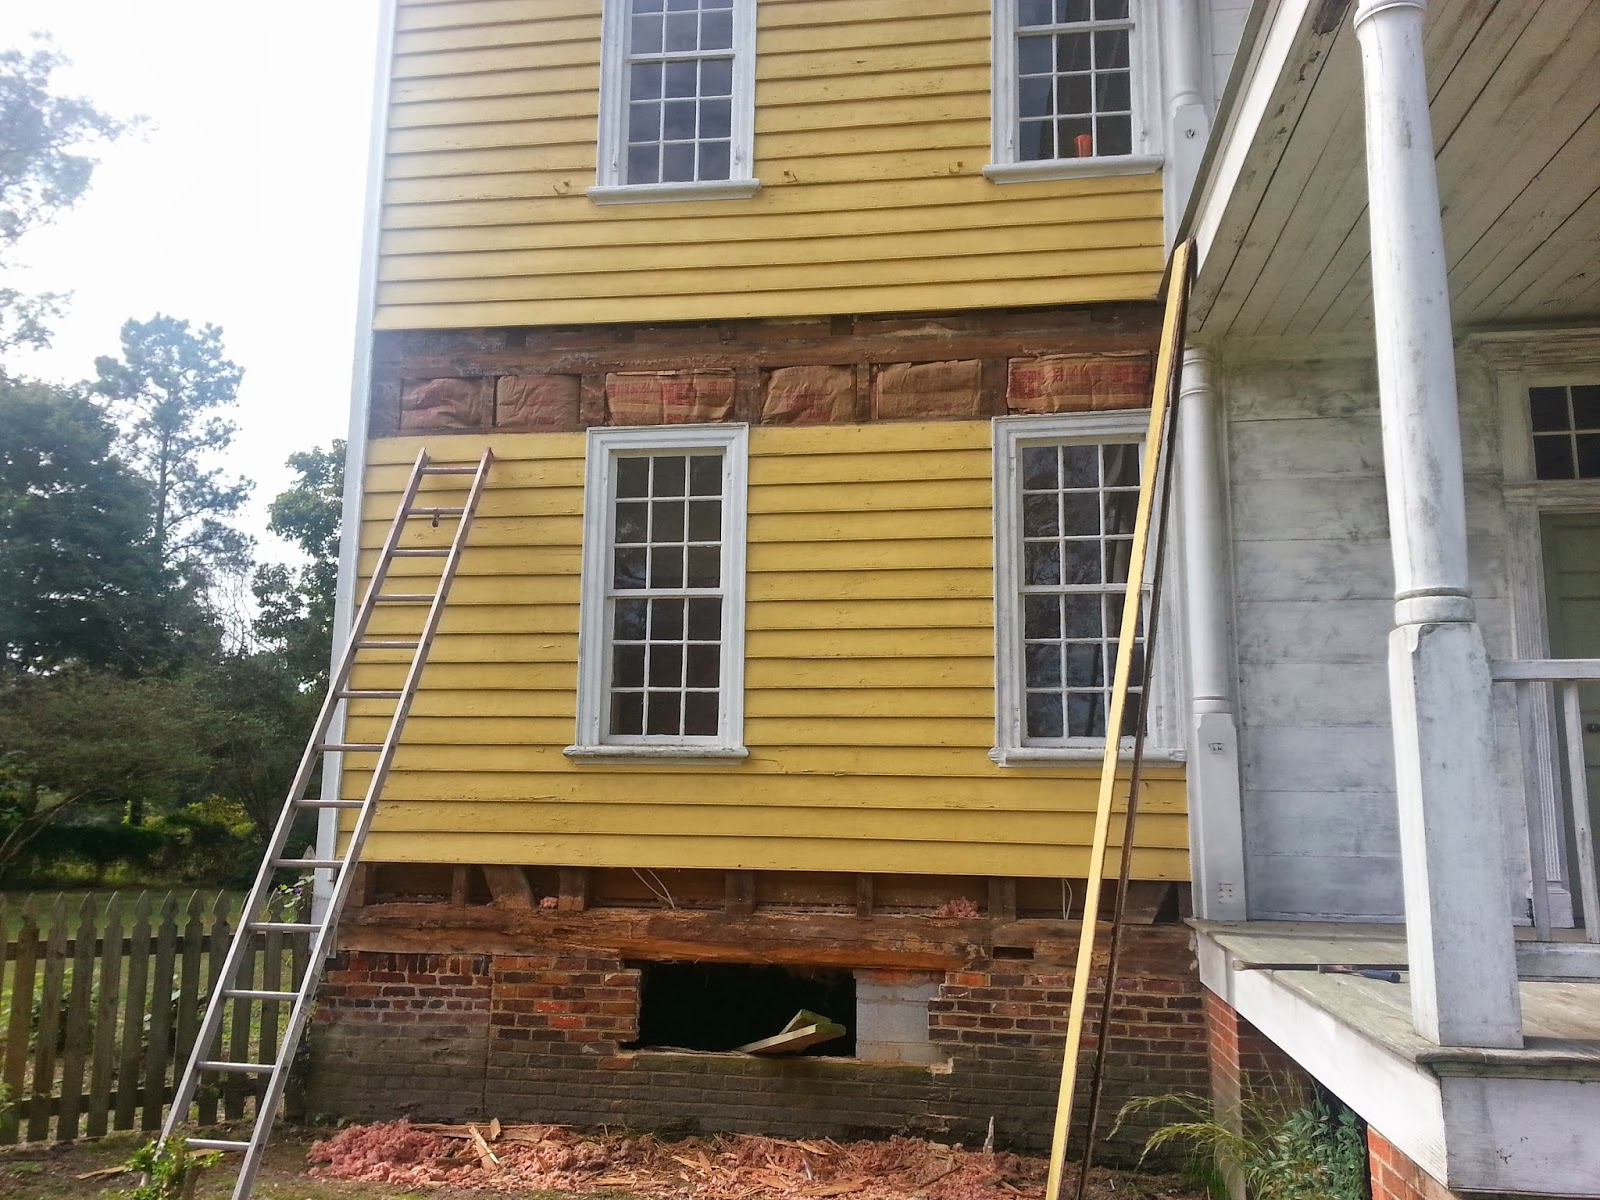
We are seeing some wonderful things happening in our living room!  After the sills were all dealt with, Jason and Dan were able to replace the joists with new timber and put in some new foundation piers.  We are so relieved that the room is going to be solid as a rock for years to come.


New joists!

New piers!


Lola, inspecting the work.


And new insulation!

 Once the structure was deemed solid, the flooring could go back down.  Since Jason numbered the planks, there was no guess work in replacing them:  each plank was put back in the same place.  The only exceptions were the two planks directly overlying the sills at each end of the room.  Because of the severe termite infestation in the sills, the termites also ate the floor planking.  We were able to source tongue and groove pine flooring so that at least the two planks that had to be removed were replaced with like material.  You can barely even tell that they are a slightly different color to the rest of the floor (due to the differences in natural wear and tear that our house and whatever building these two planks came from saw through the years).

New plank beneath the far wall, and Jason' numbering system.

Once again, Jason’s attention to detail served us well, because not only did he use a hidden-nail technique when reinstalling, but he also made sure to mark on the baseboard where the edge of each plank rested so that the floor fit precisely as it did before our renovations.  Even the old scratches still line up. 

Attention to the details

He assured us that you would never know that this floor had ever been removed…


What do you think?

Check back to see how it finally comes together with new drywall and paint!

Sunday, November 17, 2013

The Living Room Part II: The Revenge

When we left off last time, we had no living room floor.  It got a little worse after that.

Gasp!
Once all of the old joists were cut away, it allowed Jason and Dan to really see what was going on with the remaining structural timbers.  The sill running along the back of the room and the sill beneath the living room door and supporting the main stair case were both in ruins as well.  Luckily, with the living room floor out of the way, they were able to support the upper story from inside the room and replace the old timber.  They make it look so easy!

The two offending old sills

Supporting the upper story

Out with the old...


And in with the new...


That only leaves us with one original sill in the living room, and it’s still remarkably strong.  The one bad stud that Jason had to cut out was mortised into that sill, and Jason, the true craftsman he is, used the original stud as a template and carved chamfered tenons in the new stud so that it would fit in the old timber in the same way.  It made me tear up a little bit.

Ye Olde Tenon


It's the little stuff that really matters.  Even the little stuff that will be hidden in a wall for (hopefully) the next few hundred years.

Check back to see how it all goes back together...!

Sunday, October 27, 2013

The Living Room

Before the Storm (that's our new gutter to the left - it hasn't been installed yet)

When the sill came out, we could see exactly what we were facing with the living room floor.  Cue the
horror music…

...

!!!

Almost every joist was damaged and/or a total loss once again due to the incredible plague that is the termite!  While we knew that some of the joists were damaged, little did we know that all but one were no longer structurally sound.  Jason had originally planned to sister the existing joists, which would entail sandwiching new wood around the old timbers in order to take the support of the floor.  Once we realized that you could actually put your hand around the end of each massive timber and squeeze it like a sponge, we reconsidered our options.  While you may think our decision drastic, we believe it is the best thing for the house.

Removing the baseboards and lower wainscoting

The floor starting to come up...

Slowly...

The worst of the joists just in front of the hearth

In order to attack the living room joists, the flooring had to come out, piece by piece.  Before the flooring could be removed, the baseboards, lower wainscoting and the “most beautiful mantle in Pitt County” (according to Preservation North Carolina, who featured our lovely mantle on the cover of their most recent issue) had to be removed carefully from the walls.  All of that now resides in our dining room.  Jason numbered each floor plank (which are thankfully still in near-perfect condition!) so that they will go back down in the same manner they were originally laid.  This floor was an expensive feature at the time of installation – tongue and groove heart pine, affixed to the joists using a hidden nail pattern.  Jason will re-install it in the same way, and he assures us that it will look as if it had never been removed.

I took this picture while standing outside.

In removing the baseboards near the chimney, we also saw that one of the studs and cross timbers holding up the window were irreparable.  Unfortunately, the pests also began to eat away part of the window casing, both on the inside and outside, so we will do what we can to salvage these original hand-carved features.  Nothing like a few little surprises to stir up your home remodel!

Jason removing the stud using a chainsaw

All of our living room in our dining room.

Tune in for what becomes of our living room!

Saturday, October 26, 2013

Under Construction

Renovations are under way!  Jason, our builder, began the chore of replacing the front sill in the living room, and believe me, it is not for the faint of heart.  To expose the entire length of the sill, he first had to remove the lowest couple of runs of wood siding as well as the first-floor porch, and in doing so, he discovered that the most deteriorated portion of the sill was actually right under the front door.  Additionally, the studs in the living room wall had begun to compress into the sill.  The sight of this massive pine beam was awe-inspiring enough, but the added visual impact of the studs pressing down into as if it were made of sponge as well as the fact that large portions of it were nothing but dust was truly jaw-dropping.

The next step was to remove the siding in front of the second story header so that the house could be raised slightly off the existing sill.  He then jacked up the house, took out the old sill and put in the new one, and finally replaced the front porch floor.  All this was accomplished by two men over the course of 6 working days.  Astounding.


Exposing the old sill

A mortise from an older porch

Termite damaged pine sill

The worst section just under the front door

A dangling tenon.  Nobody wants to see that.

Supporting the house

Sand and wood chips.  Formerly known as "the sill."

All that's left...

Bottle jacks holding up the front of the house after removing the old timber

It looks like it's missing its front teeth.


You can see into our front hallway from under the door.

The new sill going in...

Starting to breathe a little easier now

We have touchdown


Proudly sporting her new sill

The front porch back on...

Exactly.

To be continued...

Friday, September 27, 2013

Interior Changes

We have been busy making some small changes to the interior since we moved in.  While the swag curtains may have been a more faithful representation of what would have been in the house in the 1800s, they were just not to our tastes.  They had been hanging so long that they were sun-bleached and dingy.  We also didn’t really care for the blinds.  Garreth took the liberty of taking them all down.  We haven’t yet decided what style to go with, so we are leaving all the windows bare for the time being.  And stores don't tend to stock the appropriate length for our windows, so it looks like I'll have to finally learn how to sew!  The bare windows are having the added benefit of letting the sun shine through and warming up the house.


Living room, before and after

Gloomy den

Sunny den

We have spent some time studying different styles of light fixture for the entry hall and the upstairs landing.  Most of the existing fixtures had been sold by the previous owner, so we are starting from scratch.  Once again, it was Lowe’s to the rescue!  We chose a dramatic rubbed-bronze light for the entry hall that uses three vintage Edison bulbs.  It is a bit unconventional, since it was marketed as an island light meant for a kitchen, but we think the style looks perfect in the house.  It kind of resembles a gas fixture that was converted to electricity.  We picked a coordinating flush mounted light for the upper landing that also uses an Edison bulb.  It is a bit more toned down so it doesn’t detract from the more grandiose version in the entry.

He even wore gloves so he wouldn't get fingerprints on the glass!

Love it!

And the full effect...


The old landing light

The new landing light
What do you think?